Showing posts with label craftivity. Show all posts

Sunday, February 22, 2015

Penguins, Penguins, Everywhere! ~ Art and Writing Activity

What a COLD week it's been here at the Crazy Critter Café!
We had 2 "snow" days here in NC--freezing rain, no fluffy stuff {yet}. :(
 
Since it's been so icy lately, I thought it would be perfect to continue our penguin activities.
Each year I love having students create their own penguin scene using construction paper and chalk.
 
Each student is given:
~1/2 sheet of black construction paper to make the body and wings
~1/4 sheet of orange construction paper for the feet and beak
~1/4 sheet of white construction paper for the belly
~1 whole sheet of blue construction paper for the background
~scissors, glue, and white chalk to create their scene
 
First they create their penguin and glue it onto the blue paper. Then students create their snow scene using white chalk. It's interesting to see all of the wonderful creativity!
 
Check out these adorable penguins!!


Some early finishers wanted to get extra paper, so they made a penguin family. How cute!?


Afterwards, I pulled a page from my Writing Paper Templates Pack for students to write their final draft of penguin facts.  


Finally, we read the book Penguins, Penguins, Everywhere! by Bob Barner.

 
It was a perfect, arctic week to continue with our penguin fun.
Now, I think it's time to pull out my Spring files! Maybe that'll help these cold temps to rise!
 
I've had enough of Winter already. Anybody with me? I know my friends up north have BEEN ready!


post signature

Friday, January 2, 2015

Addition Pizzas Craftivity Make Math Fun!

Hello Again Café Friends!!! {I think I've already started Winter hibernation.}
 
Welcome to 2015!
Christmas is over, the decorations are down, and I'm trying to trash as many leftover sweets as possible. {TRYING is the key word here} Ugh! Sugar is my weakness.
 
To help keep my mind off the white chocolate & peppermint covered pretzels and key lime fudge I wanted to share a fun and simple activity I created recently to help students better understand the concept of adding two numbers. We made Addition Pizzas!
 
 
Before starting this activity I cut out some rough triangles to form the pizza crust. Small strips of white paper were the cheese and red circles were pepperoni.
 
I had each student choose no more than 10 pieces each of the cheese and pepperoni. They "made" their pizzas by gluing their toppings on the crust however they wanted.
 
Once their pizza slice was "made" they were given a blank notecard. {A great Dollar Tree find--I use blank notecards all the time for students to jot down quick responses and sentences.}
 
On the board I wrote: I have ___ pepperoni and ___ cheese. Students copied this and filled in the blanks using information from their pizza slice. From that information, they were asked to use the blank notecard to write an addition equation for their pizza.


Students enjoyed this simple, fun craftivity to reinforce addition concepts we've been learning. They'd compare how many pieces of cheese and pepperoni with other pizza slices at their table, which led to a lot of purposeful math talk.  :-)
 
Throughout our lessons on addition, students completed math vocabulary journal pages related to addition concepts we were learning. These are on 1/2 pages, so it helps cut down on paper. I would copy and assemble the pages into a mini journal booklet. I chose math vocabulary words from this math pack that aligned with our learning.


This was also a great way for me to differentiate for students. To enrich, I would give students some additional word pages and allow them to use the dictionary to search for the meaning and compare that to their description.
To remediate, I would allow students to tell me what they knew about the vocabulary word as I modeled the vocabulary word with manipulatives.
These would be perfect to use in guided math groups as you meet with students to talk about these math concepts. It was also a great way for me to informally assess.
 
This is from my Math Vocabulary Journals Pack.
 
 
I hope you can use some of these math ideas with your students!
Happy New Year to all and best wishes for a productive year in 2015!!


post signature

Saturday, October 18, 2014

Fall Literacy and Art Fun

Welcome back to the Crazy Critter Café!
Is it already Saturday again? I'm certainly not complaining that the weekend is here, but last week flew by! That means another week of school down and there's still lots of learning left to do! {stress level just escalated a little}
 
I want to share some fun things we've been working on to celebrate the fall season and improve literacy skills.
 
We started with one of my favorite activities...
 
 
We read Fletcher and the Falling Leaves by, Julia Rawlinson and discussed character traits of Fletcher. He was very persistent, but didn't understand why his tree was losing its leaves. Some of the other character traits mentioned were: caring, friendly, helpful, didn't give up, and confused.
 
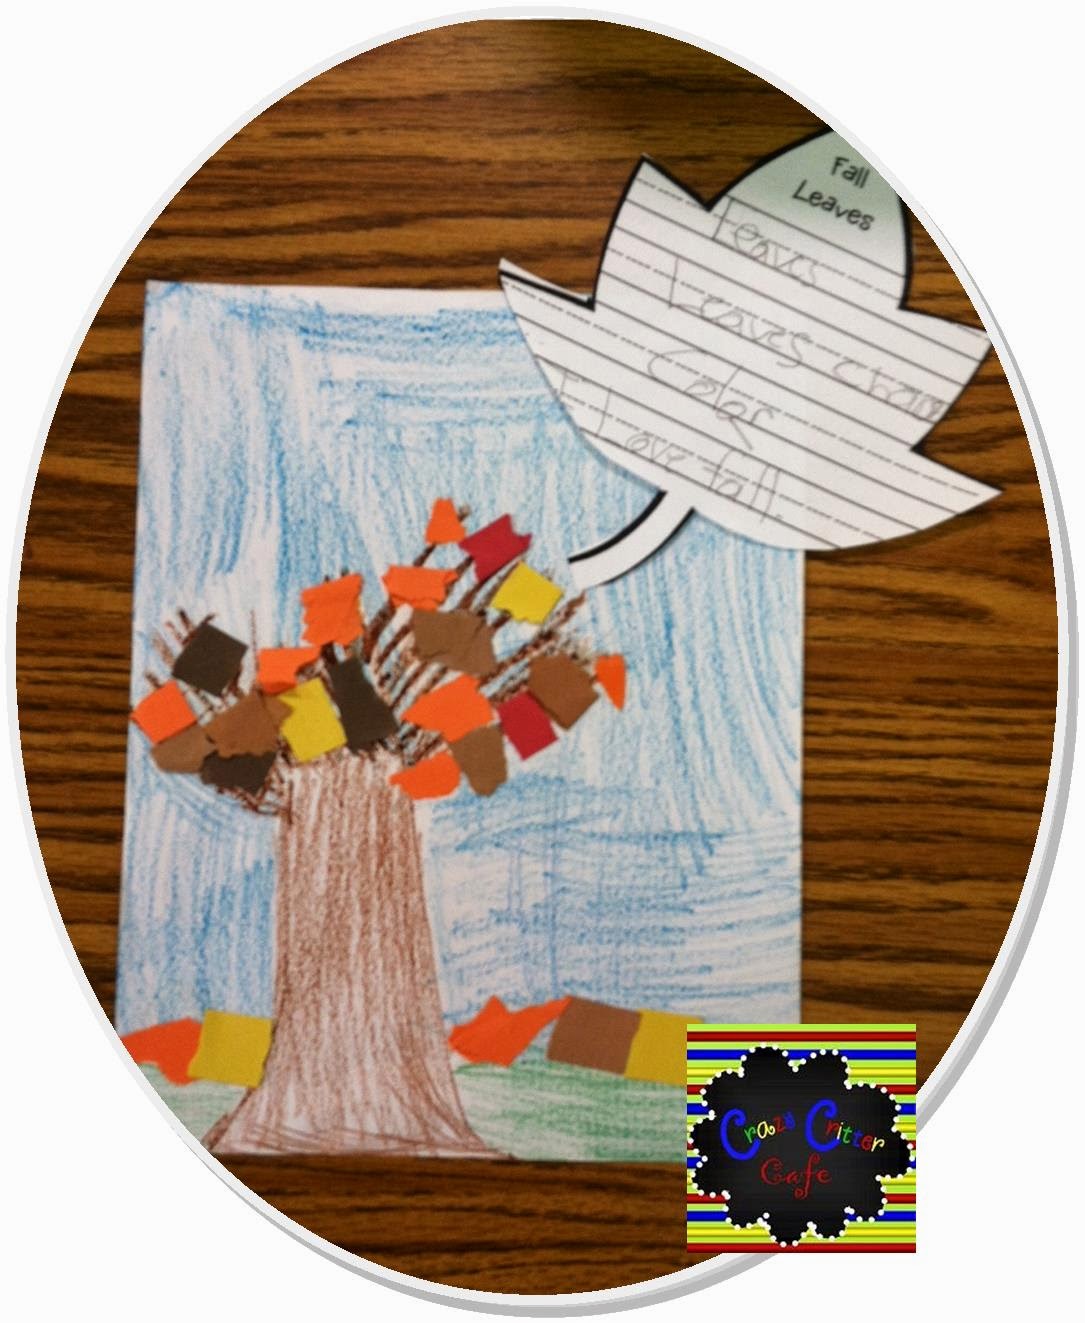
Then we created our unique fall trees from torn paper. This isn't nearly as messy as it sounds. I love how these turn out each year. Some of my little first graders can get so creative!
Here's how we do it (I use a document camera to project so everyone can see):
(Step 1)
 I give students a plain, white piece of paper and tell them this is a listening activity, so they must listen closely to hear what fun part will come next. I tell them to write their name in the middle of the paper. Once I've checked to see they all have their names, we move on to step 2.
 
(Step 2)
I tell students to take out a brown crayon from their table tub and hold it up "high to the sky". Once they've done it, and everyone has a brown crayon, we're ready to begin. I tell students to turn their papers over {so their name is now on the back} and draw a tree trunk, starting from the bottom of the page. {I model this, drawing two lines to make a fat tree trunk.}
Then I model drawing lots of branches. I tell them it doesn't really matter what the branches look like because we're going to cover most of them up with leaves. I make sure to remind them there's no wrong way to do this ~ it's their unique tree and they're supposed to look different. {and believe me, they do all look different}. Then students color in their tree trunk and any large branches.
 
(Step 3)
I tell them we have to have some grass, so they take out a green crayon {any shade of green} and I model how to draw the landscape and color it in.
 
(Step 4)
We now take out a blue crayon {any shade of blue--may be a daytime tree or a tree at night} and I model how to color in the remaining space for the sky.
 
(Step 5 - time for some leaves)
I explain to them that we will not use scissors, but we'll tear little pieces of paper to use as leaves. I show them how to use the glue stick to put glue on the branches they've drawn (NOT ON THE LEAVES THEY TEAR--been there, done that, what a mess!)
I have tables, so I prepared 6 containers with construction paper scraps in fall colors (dark green, yellow, red, orange, brown..) and let them loose on decorating their branches with leaves. They're reminded to keep all scrap torn paper in the container.
 
Here are a few more of our adorable trees:


As a follow up writing activity to practice writing a complete sentence, students use the fall leaf template to write a sentence about fall leaves.
 
Another fun fall activity we've been working on is thematic phonemic awareness and reading fluency. These skills are so important for helping students become successful readers. {and like I mentioned earlier, time is ticking and we have a lot of work to do in order to meet reading goals}
During guided reading group time I've had some of my students use these word triangles to help practice fluency skills.
 
The half sheets below can easily be copied, colored by students and sent home for extra practice.


These are from my Fall Phonemic Awareness and Fluency Fun pack. These are great ideas for literacy centers and small groups. The fall theme keeps them interested and makes reading even more fun.
 
I hope you've enjoyed these fall ideas!
 
Hope you all have a super week!!! 

post signature

Saturday, May 31, 2014

Bucket Filling Craftivity End of the Year

Hello again from the Crazy Critter Café!
Where has May gone?! Between having 2 boys playing baseball, end of year assessments and activities at school, this month has been a total blur. Only 9 more days and it's sweet SUMMERTIME! {minus workdays and professional development.... but who's counting?}
In the midst of all the assessing, schedule changes, and end of year activities over the past several weeks, the kids have been a *little* out of sorts {well, maybe more than just a *little*}. I decided we needed to come together and have a little heart-to-heart, come to Jesus meeting.
Some are having such a hard time getting along so I decided we needed to have another lesson on bucket filling. I read the book Bucket Filling from A to Z, by Carol McCloud and Caryn Butzke. ·  We talked about all the ways we've filled buckets this year and how we felt when we filled someone else's bucket, when our bucket was filled, etc. AND THEY ALL SAT AND LISTENED...and PARTICIPATED...AND COOPERATED!!!

After reading the book I wanted to extend this little spur of the moment meeting, so I let them create their own bucket and write ways they have either filled someone's bucket this year or ways their bucket has been filled. This was a very simple craftivity, nothing fancy at all, but it had their attention! And they loved talking with their table teams as they shared bucket filling ideas. They were HELPING each other, filling buckets during this activity ........and they didn't even realize it.

http://crazycrittercafe.blogspot.com/2014/05/bucket-filling-craftivity-end-of-year.html
I started by giving each child a plain sheet of white paper. They were to follow my directions on how to draw a bucket. As you can see, they turned out in different sizes and shapes. This was a great teachable moment to demonstrate how we all are different and our "buckets" inside {our feelings} are also different.
Then we brainstormed all the ways we've seen bucket filling in action this year and they wrote some ideas on their buckets that applied to them.
We then glued wiggly eyes and I drew a smiley face with a Sharpie. To make the handles I hole punched edges of the bucket after it was glued on construction paper, laced yarn through each hole and taped it on the back to stay in place.

They loved sharing ideas on their buckets! This little lesson encouraged them to get back on track finding the "good" in people ~ being bucket fillers again.
We displayed our buckets in the hall for everyone to see how we've worked to be a bucket filling class. Now let's hope we can continue this excitement for the next 9 days! :-)

http://crazycrittercafe.blogspot.com/2014/05/bucket-filling-craftivity-end-of-year.html

Thanks for stopping by the Crazy Critter Cafe! I'd love to hear how you encourage bucket filling in your class! Have a great last few weeks if you're still in school. If you're out, enjoy your summer!


post signature

Friday, April 18, 2014

Easter Fun ~ Read now & save for later!


Happy Easter weekend everybody!
Today officially starts our spring break and my "to do" list is growing longer by the minute. Between yard work, house work, school work and cleaning out my boys' closets {I'll tackle mine during summer vacation!}, maybe I'll get something productive accomplished on this week off. My life seems like one big "project". There's always something I'm working on. Anybody relate???
Although Easter is already here, I'd like to share some cute things we did the past few weeks. Read now, save for later. :-)
We read one of my favorite stories Easter Eggs Everywhere! by, Steve Metzger. This cute little rhyming book is a great way to incorporate problem and solution. Bunny wakes up late and realizes Easter is just a day away and he needs to get his eggs painted. With the help of a sly fox, bunny is convinced into getting an egg-painting machine that ends up being more trouble than it's worth. With the help of bunny's friends, the eggs get painted just in time for Easter.
Following this story I like to create our own eggs, but using "magic spray" instead of an egg-o-matic machine, like in the story.

Here's how we make our own eggs:
(1) Cut out an egg shape on coffee filters. I usually staple several filters together and cut. It takes up less time. To flatten filters, put them under a pile of books for a while.

(2) Students use WATER BASED markers to design their egg. I let them design it any way they'd like, encouraging them to use bright colors. I write each student's name on the edge of the egg with a PERMANENT marker so it won't mix with the other colors when sprayed.


(3) Then I tell the kids I'm going to use my "magic spray" {WATER!} that will transform their eggs. I spray each child's egg on a plate and let dry.

http://crazycrittercafe.blogspot.com/2014/04/easter-fun-read-now-save-for-later.html
(4) As the eggs are drying I let the kids be creative and think of a good place they would like to "hide" their egg. I created a simple prompt for them to fill in the blank. "I will hide my Easter egg ___________."
Once the eggs are dry, I staple it to their sentence.

Check out our colorful eggs!
http://crazycrittercafe.blogspot.com/2014/04/easter-fun-read-now-save-for-later.html

Kids loved how their egg magically changed with the spray. {They still don't know what's in that magic spray bottle. And that magic spray is good for other things besides changing eggs, too! Anything that needs a little magic...just spray it on!}


Another little craftivity I like to do around Easter is make bunny bags. This is a following directions activity. Print a copy of the directions page here.

http://crazycrittercafe.blogspot.com/2014/04/easter-fun-read-now-save-for-later.html

Here's how we make the bags: (I have everything pre-cut so all the kids have to do is glue. I don't have templates for the pieces. I cut the pieces to fit the size brown lunch bags I have, as some are smaller than others. For the eyes, I made copies of those on the photocopier and just cut them out.)

(1) Using the following directions page (see link above), read each direction aloud to the class.
(2) They follow each direction to complete their bunny bags. (I have a finished one on display so they can have something to go by.)
http://crazycrittercafe.blogspot.com/2014/04/easter-fun-read-now-save-for-later.html

http://crazycrittercafe.blogspot.com/2014/04/easter-fun-read-now-save-for-later.html

http://crazycrittercafe.blogspot.com/2014/04/easter-fun-read-now-save-for-later.html

http://crazycrittercafe.blogspot.com/2014/04/easter-fun-read-now-save-for-later.html

http://crazycrittercafe.blogspot.com/2014/04/easter-fun-read-now-save-for-later.html

http://crazycrittercafe.blogspot.com/2014/04/easter-fun-read-now-save-for-later.html

The bunny bags do take a little bit of prep time, but once the pieces are cut, it's easy. An alternative would be to let students create their own by giving them the construction paper, allowing them to cut their own pieces. That should make for some unique bunnies!

Thanks for stopping by the Crazy Critter Café!
Hope everyone has a very Happy Easter!

post signature